Computers are valuable targets to thieves. Laptop computers are often targets of theft. Home computers are, too. Either type of computer might be all a thief wants from you.
Your computer is not just the hardware and software that can be replaced at your favorite technology store!
Consider what a thief might do with your stolen computer. They might sell it for parts. Or worse, they might keep and use it to impersonate you, to look at your personal data files, to learn who you are by reading the details you have accumulated in your computer's files. All your e-commerce user names, passwords, financial records, tax returns, banking records, personal and business letters, email, etc. are there for the thief to exploit now, or even months or years later.
Identity theft, is a crime that can devastate anyone, at anytime, and your computer is likely to contain everything the identity thief needs. This site will help you protect yourself by making the private data in your computer very close to impossible to access and use.
I have researched many ways to protect your computer. The methods and products range from simple to complex, free to very expensive.
The simple methods are often ineffective. For example, Windows XP provides for a computer's administrator and users to each have their own passwords to login, and it can even encrypt your files. It is fairly easy to setup and use. It sounds safe. It is not. A thief needs one easy to make floppy or cd that will crack the password and remove the encryption in only a few minutes. No special talent or technical savvy is needed. The instructions are easy to find and use.
Windows also offers high security with features like EFS, syskey, file & folder encryption, and various NTFS security settings. These features offer very good security, but it is at the price of being very difficult to learn, setup, and administer. Further, they add considerable complexity in maintaining, backing up, troubleshooting, and restoring your PC when the need arises. Windows’ own built in security, effectively applied, is a career in itself.
A review of various encryption methods and products often finds the best middle ground of ease of use, cost, and safety is provided by encrypted container virtual drives. Most web searches for computer security products will find applications that perform this function. It sounds messy, but it is actually quite easy to setup and use.
The encrypted container is an ordinary file on your computer. It can be put anywhere. To anyone without the proper program and the right password the data in the file is gibberish - a block of random bits of no value whatsoever. To the user who has the password the data is transformed into a drive letter, a virtual drive, that can be used to store any kind of file that can be stored on a physical hard drive. The drive does not exist unless you know the password and is very close, if not impossible, to crack open.
One of the best applications available for the creation and use of an encrypted container virtual drive is free - absolutely and completely free for any use, forever. No strings attached. No ads. No spyware. It is TrueCrypt. TrueCrypt is written and maintained by a group of skilled programmers who only want you to have the best possible product. They do this at no cost.
(If you would like to read more about TrueCrypt, click this link.)
TrueCrypt is a sophisticated application. It can be setup and used on any Windows 2000 or XP computer. TrueCrypt can be setup and used in many ways for different purposes. For our application of simply assuring your data is safe, yet easily accessible to the average user, the following step by step instructions will guide you. The setup is detailed and requires close attention. After you use the following setup instructions your day to day use of TrueCrypt will be very easy.
The question was asked, “Will this really work?” If you want your personal data very safe from a common criminal, yes, this is good protection. The underlying TrueCrypt encryption technology is very tough. The thief who can’t access your personal info is likely to junk your stolen gear and sell it for parts. They know they can quickly find other stolen computers that are easier to exploit for personal data. If your intent is to conceal information from spies, or the law, you should look elsewhere. TrueCrypt documentation does provide techniques that may work, but the procedure outlined on this site is not intended for this level of security.
If you are interested in using TrueCrypt in other ways, please read the extensive TrueCrypt User's Guide that is included with the program. You can use it to encrypt entire drives such as USB drives, etc. There are even methods of using double encryption where a false password can open your encrypted drive only to reveal decoy files. It is some interesting cloak and dagger reading.
Setup TrueCrypt 3.1a
(11/21/2005 – Notice of TrueCrypt version upgrade: TrueCrypt version 4.0 was released November 1, 2005. It has not yet been tested with these instructions. If you try it out, please post what you learn in the comments. New instructions will be posted here when time permits. In the meantime, TrueCrypt version 3.1a is still available and is still excellent protection.)
This site is a work in progress. You can help by trying out the instructions below and letting me know how it goes. Improvements will be made based on your comments. Click here to add or view comments.
The first thing you need is your own copy of TrueCrypt. This web will show you how to install TrueCrypt version 3.1a. You may have to adapt the procedure to install other versions. TrueCrypt works only on Windows 2000 and XP.
Click this link to locate a download location for TrueCrypt version 3.1a.
You can download from any site listed.
Unzip the zip file to find the TrueCrypt setup file.
Here we go!
1 - Double click the setup file to begin the setup process
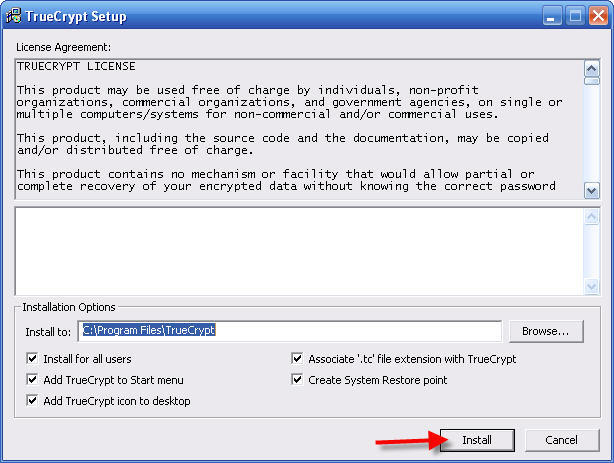
2 - Accept all the defaults and click Install
The next steps are going to be the creation of the "volume" which is the container for your encrypted data. It will be important to have a reasonable idea how large to make this file. It can be rebuilt to a different size in the future, but you will want to have a good size to start with. A rough idea can be found by checking the Properties for your My Documents folder. If most of it is what you want to protect, then that is is a good size. If it is not too large, double it for insurance. Remember one Gigabyte of ordinary data is a HUGE amount. You only might need more if you have media files you also want to encrypt. I made my drive 2 Gigs, or 2000 Megabytes. You can make an enormous file of many Gigs. If you have the room on your drive, and can accommodate the size in your backups (You do backup your files, don't you!?) then make it as large as you like.
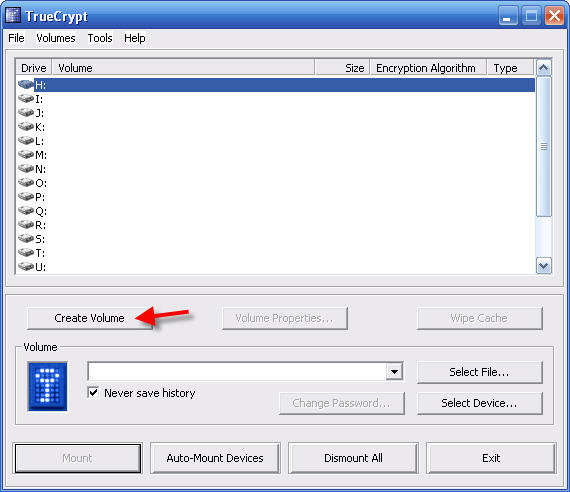
3 - Accept the defaults and click Create Volume
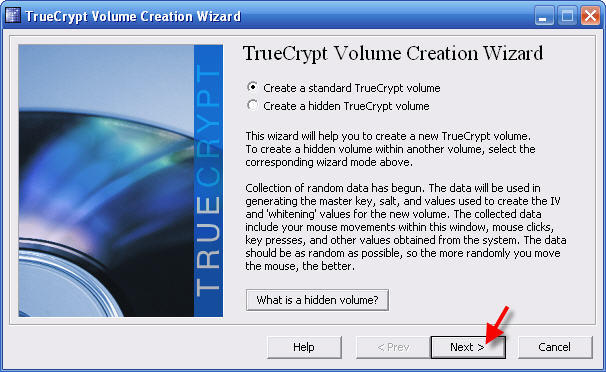
4 - Accept the defaults and click Next >
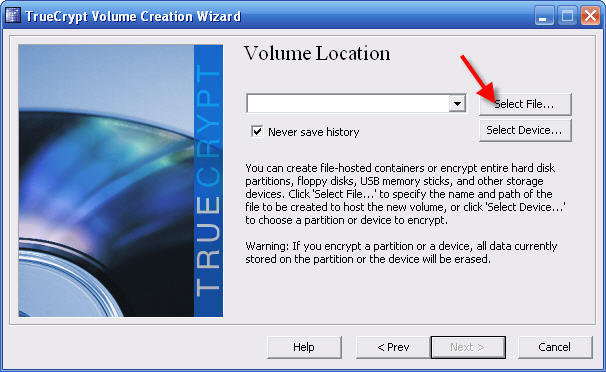
5 - Accept the defaults and click Select File. . .
6 - Browse to My Documents by clicking the My Documents icon on the left side
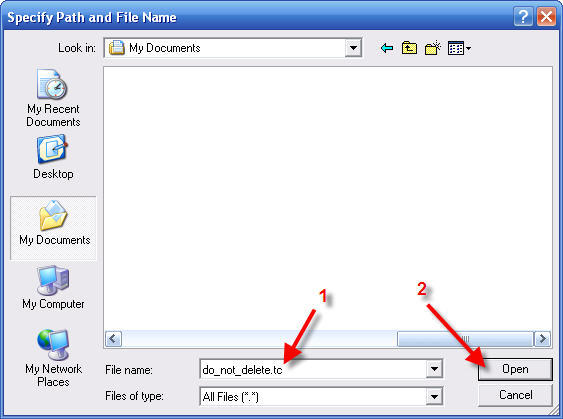
Here you have the option to choose any filename at all. If you use the extension .tc then Windows will know this is a TrueCrypt file. The suggestion "do_not_delete.tc" is to remind you to not delete the large file when you do future computer house cleaning. It is suggested you locate the file in your My Documents folder. This will make it easy to add a new TrueCrypt file for every user and keep them sorted out for ease of reference and backups.
7 - Enter File name: do_not_delete.tc
Note! Do not move or delete the do_not_delete.tc file! This is the container file that will appear as a P: drive later in these steps. If you move this file, your P: drive will fail to open without intervention not specified here. If you delete this file you will loose your P: drive and its entire contents.
8 - Click Open

You will now have the path to your My Documents folder populated.
9 - Click Next
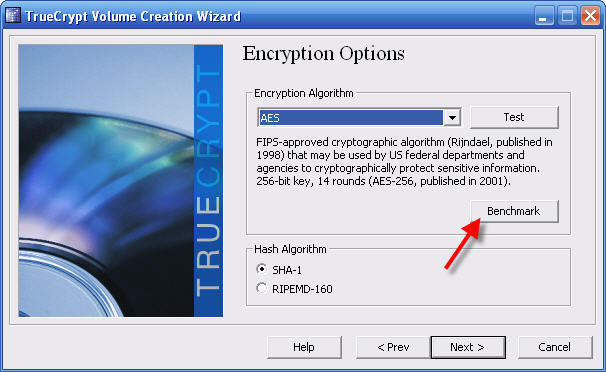
10 - Click Benchmark
Now we are going to find an encryption algorithm that works fast on your computer. You can choose any algorithm, but the ones that appear at the top will be offer the best performance.
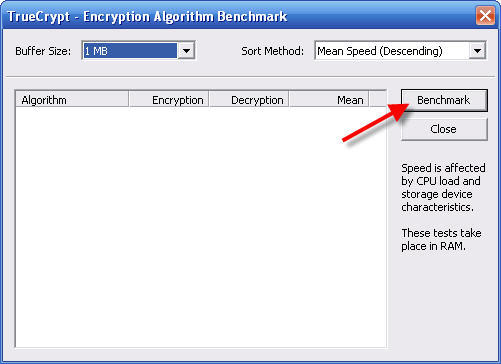
11 - Click Benchmark
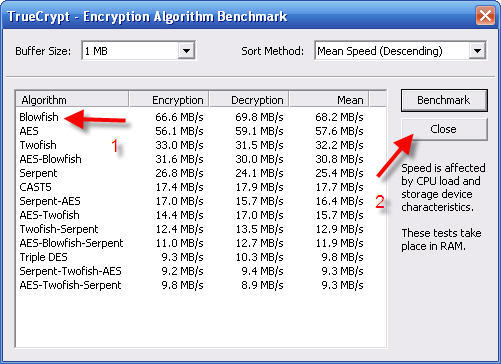
Blowfish is best for me and likely you, too. AES is another fast choice. Any choice near the top is good. Recall the one you want to use.
12 - Click Close
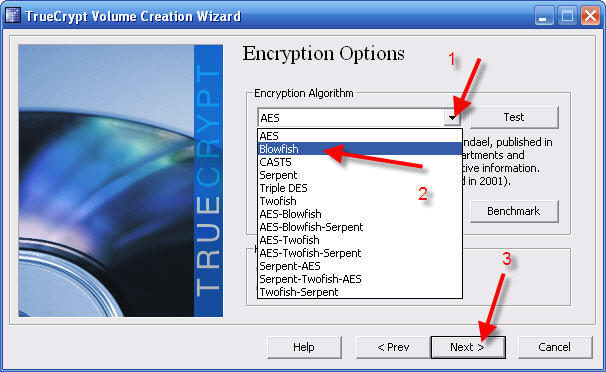
13 - Click the Encryption Algorithm selector arrow
14 - Click to highlight the algorithm you chose in the earlier step
15 - Click Next >
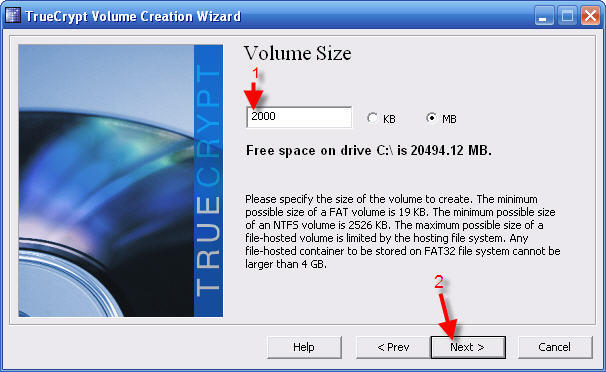
16 - Enter the Volume Size. 2000 MG is about the same as 2 Gigabytes.
17 - Click Next >
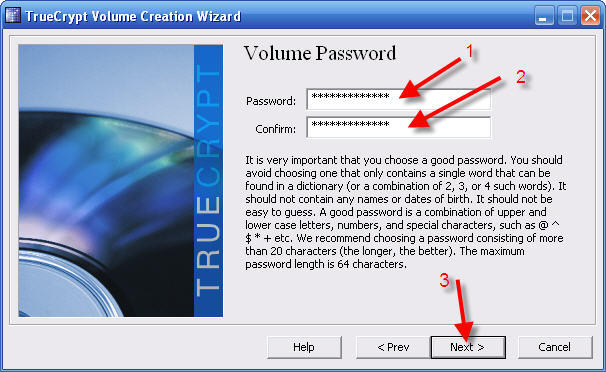
You will now be choosing your new password. This is a very important password! Read the instructions for tips on choosing the best password. You can use any password that you can recall. Don't use personal info! It is too easy for bad guys to figure out your children's initials, birthdays, phone numbers, etc.
18 - Very carefully enter your new password twice, once in each box
19 - If the two entries match you can now click Next >
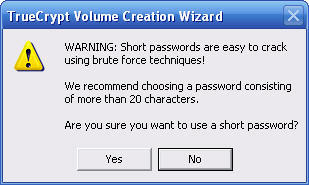
20 - If you created a "short" password you will now click Yes to accept it, or No to back up and change it
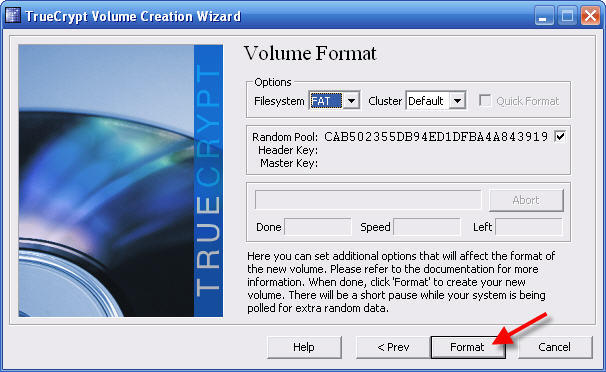
You can change the Filesystem to NTFS if you want more file system features.
21 - Click Format
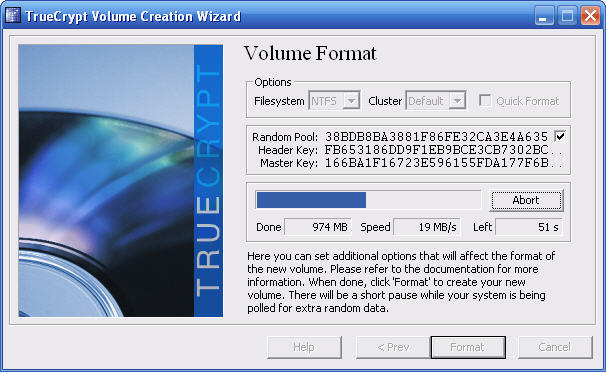
Your new "drive" will now format. This can take a few minutes.
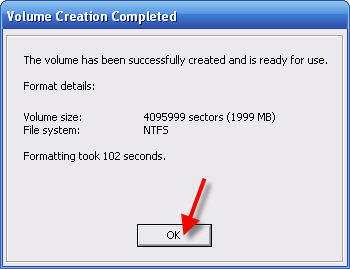
22 - Click OK
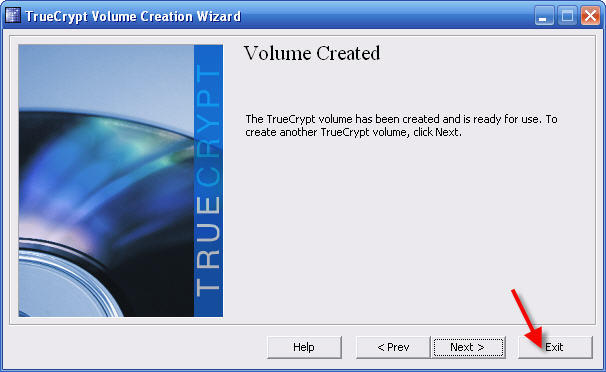
Your new encrypted file is ready to use, but there is more to do that will make its use much easier later.
23 - Click Exit
You will find a new TrueCrypt icon on your desktop and in your Start menu. You can delete this icon, or use it to explore the many features of TrueCrypt that are not documenting on this web.
In your Start menu TrueCrypt menu is the TrueCrypt User's Guide. This will provide a great deal on information for further exploring TrueCrypt and troubleshooting any problems that might arise.
Setup Automatic Mounting Of Your TrueCrypt Drive
The following instructions will enable your TrueCrypt Drive to "mount" every time you login as the user that performed the setup above. Mounting means that the encrypted file will become opened as though it were an actual hard drive. It is available to you to store any files up to its capacity as you defined during setup. The drive letter that will be used is P: to remind you that it is a Private drive.
These instructions show the path to my My Documents (Michael). You will need to know the name of your My Documents and substitute appropriately or else this procedure will not work for you. (Unless your name is also Michael!)
We will placing a shortcut into your Startup folder. You can choose to place it anywhere, like your desktop, in addition to, or instead of your Startup folder.
1 - Click the Windows Start button
2 - Click All Programs
3 - Locate the Startup icon (you may need to expand the menu) and Right click Startup
4 - Click Open and the Startup folder will be revealed
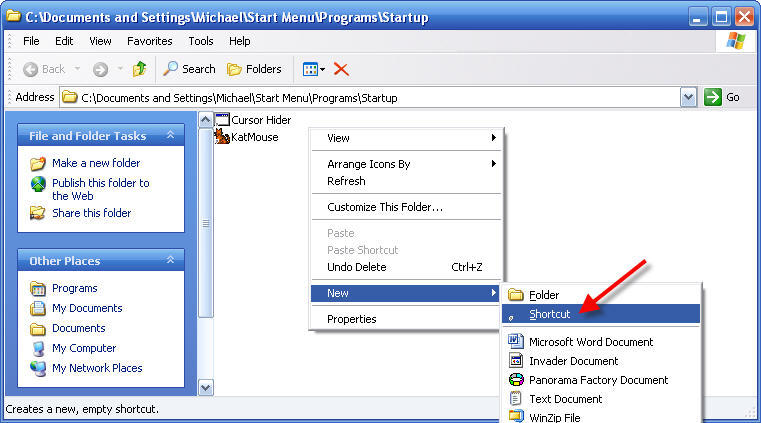
5 - Right click in the open space, click New, then click Shortcut
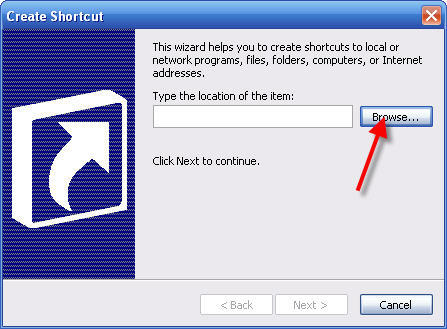
6 - Click Browse. . .
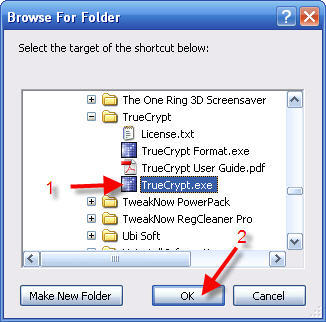
7 - Browse your way to find the TrueCrypt.exe program icon
8 - Click to highlight TrueCrypt.exe
9 - Click OK
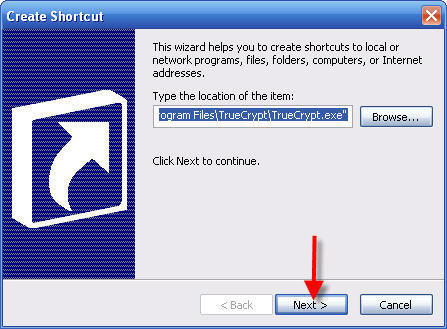
10 - Click Next >

11 - Enter Mount Private Drive (or other descriptive word/phrase)
12 - Click Finish
A new icon will appear in your Startup folder called Mount Private Drive
13 - Right click the new icon Mount Private Drive
14 - Click Properties

Take a break because you are almost done and here comes the trickiest part of this entire project. You will need to change the Target text to something longer, and more complex. Any little mistake here will result in unknown behavior. If this step gets messed up, you can repeat it to get it right. It will work best if you print the next line out and type very carefully, or use copy and paste to get is exactly right.
One thing will be changed in either case! You will change the word MyUserName to your actual user name as found in the path to your My Documents folder. This is going to be the path to your new TrueCrypt file as installed in the installation steps.
Here is the full text of the Target you will need to enter, changing only the word MyUserName to your real user name.
"C:\Program Files\TrueCrypt\TrueCrypt.exe" /v "C:\Documents and Settings\MyUserName\My Documents\do_not_delete.tc" /lp /b /a /q /e
Here is the same line in tiny type for easier copy and paste:
"C:\Program Files\TrueCrypt\TrueCrypt.exe" /v "C:\Documents and Settings\MyUserName\My Documents\do_not_delete.tc" /lp /b /a /q /eNotes: If you do not want an Explorer window to open after the password is entered, then remove the “/e”. All the characters are alpha letters. There are no numbers. The “/lp” is ell-pee and is the switch that controls the encrypted drive letter. For more info on these options see the TrueCrypt help file.
15 - Change the Target text to: (the text in bold in the line above)
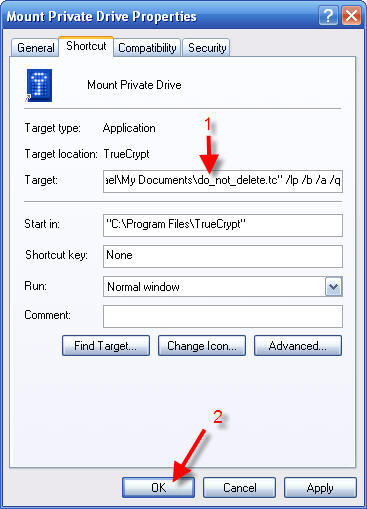
16 - Click OK
It is now time to test your work!

17 - Locate the Mount Private Drive icon and click to run it
18 - Enter the password you chose when you created you setup TrueCrypt
19 - Click OK
TrueCrypt will now mount your new P: drive and open a new window showing its contents.

If this window does not open, check your My Computer icon to see if you have a new drive P:. If you don't see drive P: you may need to double check the Target text you entered on the Mount Private Drive shortcut. If you still don't see drive P:, try to run TrueCrypt from the new icon on your desktop and tell it to Auto-Mount Devices.
If all has gone according to plan you are now done!
From now on, when you start Windows and login to your session you will be presented with the TrueCrypt password login window. Just enter your password and you will be on your way.
Your new P: drive is initially empty (except some normally invisible Windows system folders.) It is up to you to use it exactly as you would a “real” hard drive. Drive P: is available to you for the use in any application. You can create, or modify any folder or file in drive P:. You can also move any sensitive material from insecure folders to folders in drive P:. After you move files to your P: drive, don't forget to empty your Recycle Bin. You can also apply any other security tools that further clean up deleted files.
Earlier I mentioned backups. Be sure you include your TrueCrypt file (earlier named do_not_delete.tc) in your backups. In the event you need to recover from your backup, just re-install TrueCrypt and it will be able to open the restored file - so long as you have the right password!
Password Change
Change your password as often as you like, but be very careful that you know the password! TrueCrypt passwords cannot be retrieved by any known tool and there is no back door to your protected files. In the event you loose your password there is no way to recover your files!
1 – Start the TrueCrypt program using the TrueCrypt icon on your desktop or in your Start menu
2 – Click Select File, then browse to your My Documents folder (or to any other location you may have used)
3 – Click to highlight the file do_not_delete.tc (or other name you gave your TrueCrypt container file)
4 – Click Open
5 – Enter your current password, then your new password twice
6 – Click Change
If you selected a short password you will need to answer the next question, then you are done.
Click for how to create and use a secure Firefox profile in the TrueCrypt secured virtual drive.
Future plans for this web page:
Learn how to add Microsoft Internet Explorer cache and cookies to the TrueCrypt virtual drive.
Add instructions to add your email content folders to the TrueCrypt virtual drive.
Comments and suggestions are welcomed!
Please click to add or view comments.
¶ 21.11.05

